
Here's my last minute Halloween costume, and a pretty simple how-to for turning an oversized tshirt into a dress. I wish I had thought to do a photo tutorial, but alas. Next time.
I'm always last minute when it comes to costumes, and amazed I pull it off sometimes. My mom asked why I always do that, but I just can't help it. I've been busy going to school this month, so I didn't set a lot of time aside to decide what to wear to my friend's Halloween party, and I got a little lazy. I wasn't going to dress up in costume at all. But I just can't pass up an opportunity to get dressed up for any event!

Difficulty: Mild
It's really just a dress, not necessarily Halloween-y, and I put on some zombie makeup. This dress could be worn anytime in my opinion.
Materials:
1 t-shirt that's too big on you. In this case, I think mine was a men's large
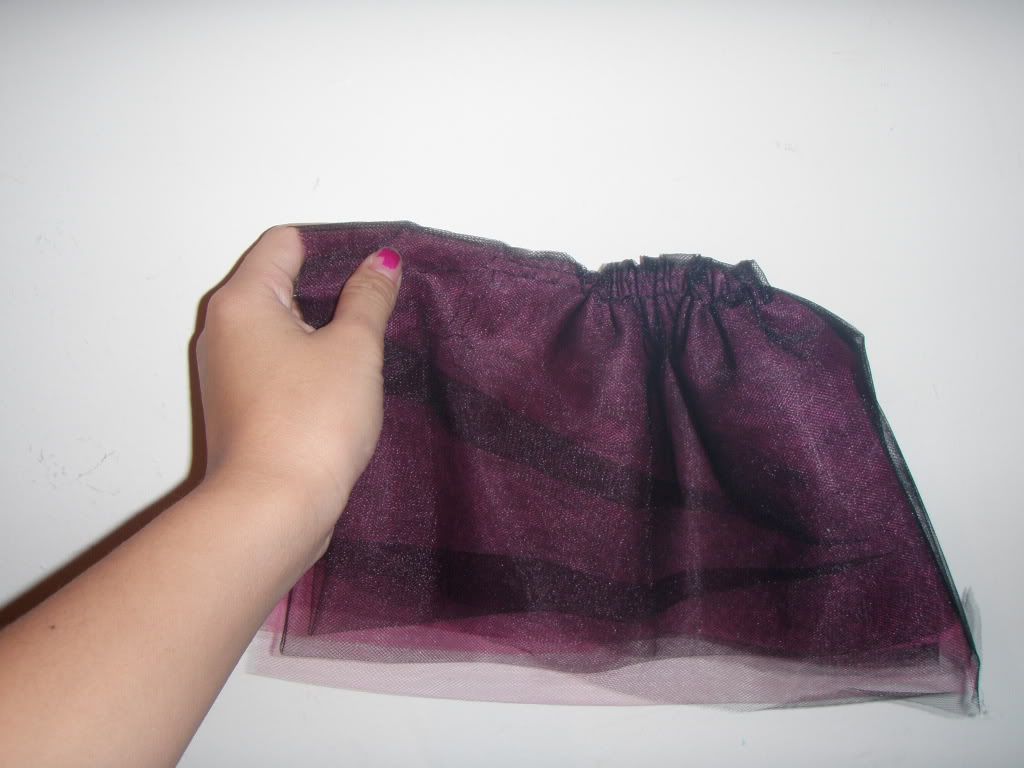
2-3 meters of fabric for the skirt. I used 2 different colors of tulle to make a tutu, but you could use anything. I've cut up thrift store clothes, or picked up $2 fabric in the clearance section at FabricLand
1 meter of hook & eye tape, but just the eye part. You can usually find it separate on spools at fabric stores
1 skein of ribbon in a co-ordinating colour
Fabric scissors. Never cut paper with them as it dulls the blade
sewing machine or a needle and thread and some patience
chalk (from a dollar store works fine)
Step One:
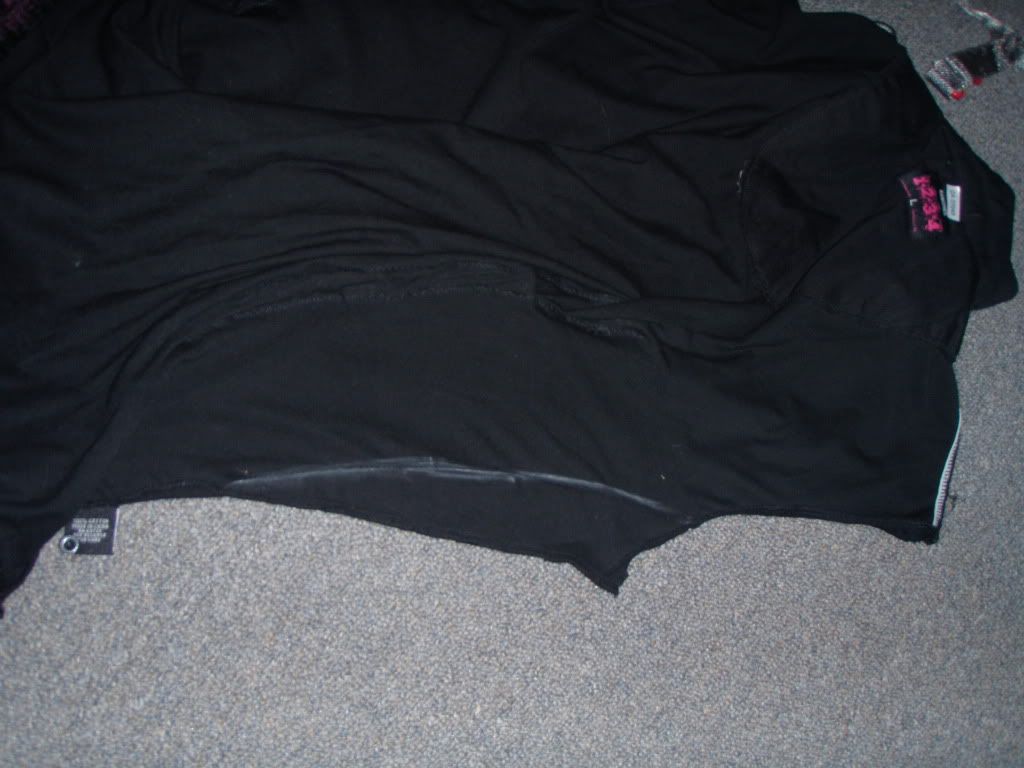
Cut the sleeves off the shirt without cutting any seams, and put it on inside out. Mark with a piece of chalk where you want the armhole to close under your arm. If the shirt is too big, chances are the arm holes are way too big, too, so you'll need to alter it.
Step Two:
Sew up the area under the arm holes. It doesn't have to be perfect, since the corset ribbon will pull the back and hide any mistakes. And since it's tshirt material, I don't usually bother with hemming the arm holes or anything, just tug on it a little and it rolls. Tshirts don't normally fray. (If you need to make sleeves, check out this simple tutorial)
Step Three:
Turn the shirt right side out again, and put it on to see how it hangs. Get a buddy to help you make 2 marks straight across the back of the shirt - one goes along the bottom of your shoulder blades, and the other should be somewhere around your hip.

Step Four:
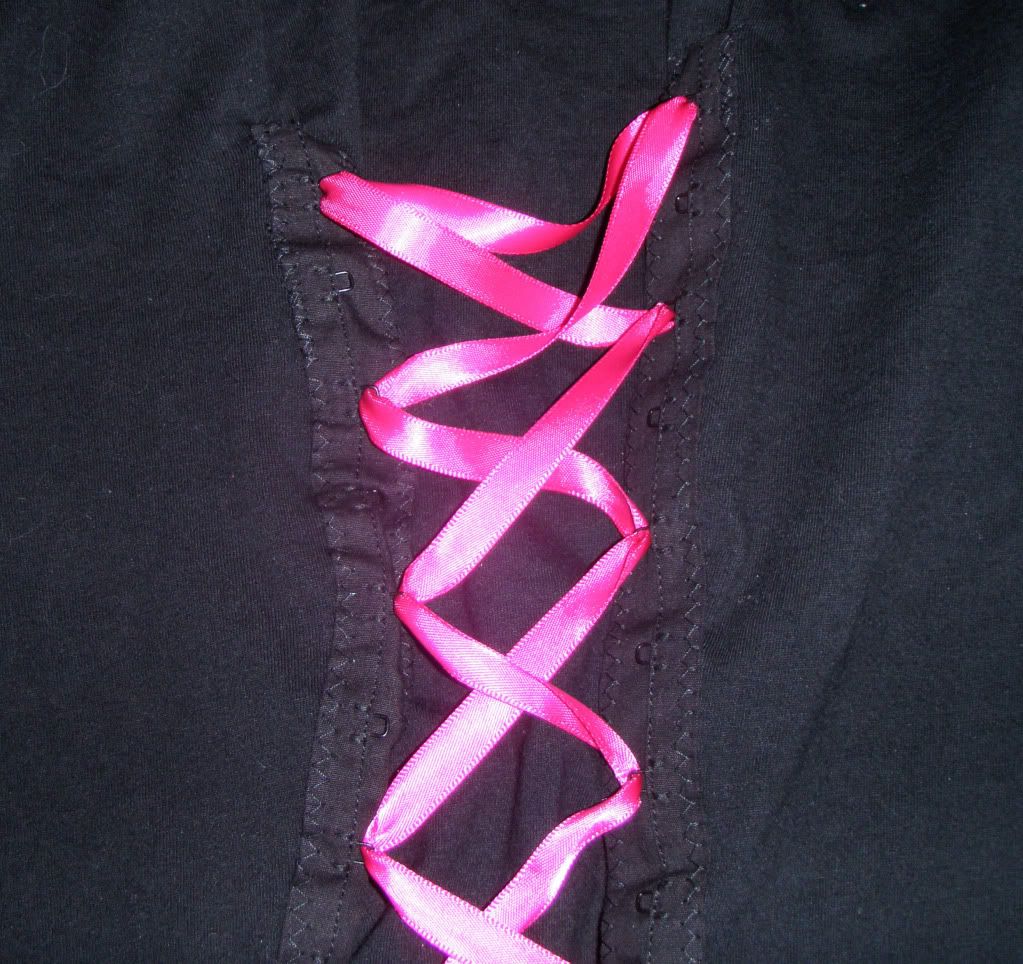
Lay the eye tape down in 2 strips with the eye loops facing each other, and pin it to the shirt. Arrange it however you like a corset to look. Get creative! Another suggestion is to mark and place the corsets along your sides instead of the back. I love the corset look because it's not just useful for making anything fit, but looks good too, and adds some texture. Now, sew the eye tape to the shirt.
Step Five:
Get your frill fabric ready. Put the shirt (now it's almost a dress) on, and measure how long you want the skirt to go. You can keep it short like I did, or choose to make it longer. You could even go full length if you prefer that look. Most fabrics will come in 40 or 60 inches, and you get it folded in half. My tulle came in 40", and I'm lazy, so I simply folded it a couple times without cutting at all. It takes time to pin it, but tulle is finicky and much easier to cut afterward, plus I wanted the poofy layers. If you're using cotton or any other fabric, then measure it out for whatever length you want, and add about 1.5"-2" for seam allowance and hem.
Step Six:
Now we're going to ruffle the skirt. If you have a sewing machine, use a straight stitch and set your stitch length/width/tension as loose as it will go. If you're sewing by hand, use fairly long, loose stitches for this. If you use a machine, do not knot or finish the ends, you must leave long threads from both bobbin and spool on either ends of the fabric. Now, sew along the long edge of your fabric. Then, pull the threads to gather the fabric into a ruffle. Depending on your skirt preference, and your level of skill with sewing, you can pleat, make a circle skirt, make an A-line skirt, whatever you please! The amount of fabric you use affects how poofy the skirt will be. So if you don't want it to be too cupcake-like, use less fabric and you'll have to adjust and gather loosely. 2.5-3 meters is what I normally use. Generally, the ratio of measurement for a skirt is the hem should be at least twice around your waist. (Use this tutorial if you need more photos on how to ruffle).
Step Seven:
Hem your skirt if you need to. I didn't, because I used tulle and the idea was for it to be uneven raw edges. To hem, you'll need to iron the un-ruffled raw edge of the fabric. Just fold it about .5" (or about 1.5cm) underneath, and press it with an iron. Then, sew it down with a machine, or if you're doing it by hand, use a backstitch or hem stitch, depending on your level of skill.
Step Eight:
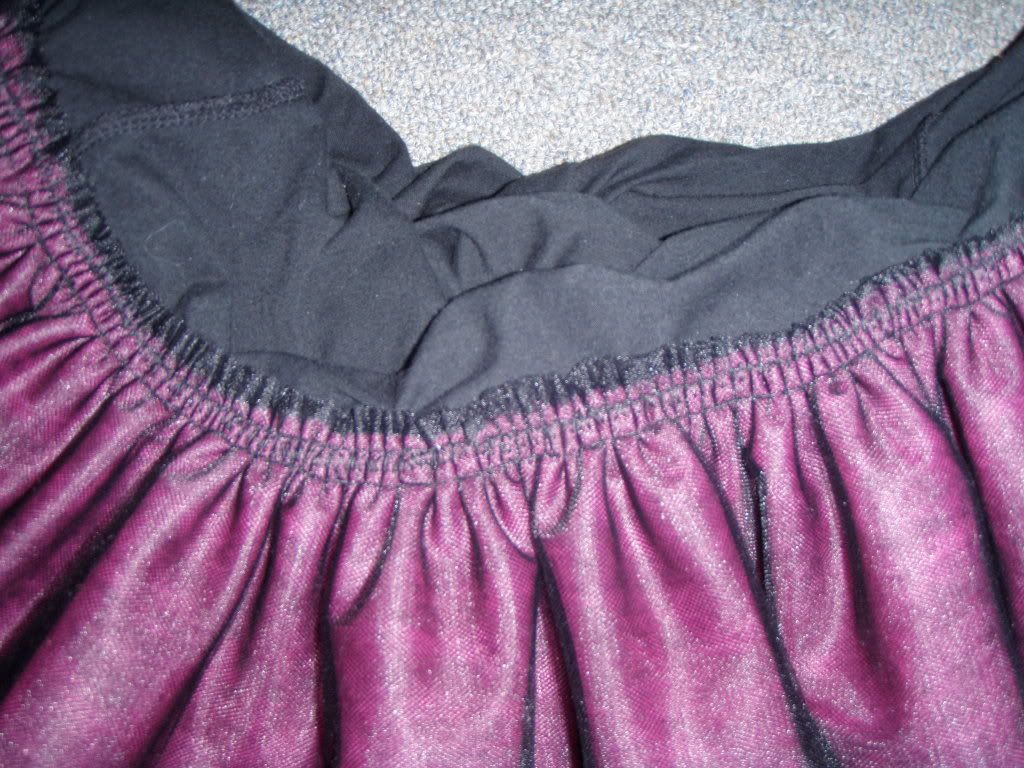
Now you're going to pin the ruffled skirt to your tshirt RIGHT SIDES TOGETHER. I can't stress that enough if you have patterned fabric for the skirt. Match up the bottom of the tshirt hem to the gathered edge of the skirt. You could rip the stitches on the shirt hem, or I usually just pin and sew directly over the existing threads on the bottom of the shirt. This is because tshirts are sewn with a serger, which has 4-8 threads on it, instead of a standard 2 thread machine. That makes it really fiddly and difficult to pull all of it out, so I just don't bother. :) Now sew the skirt onto the tshirt.
Step Nine:
Thread the ribbon through the eyes on the eye tape. (Easiest to do this last so that you don't have ribbon hanging in the way while trying to sew the skirt on). If you get the regular $1 synthetic satin ribbon like I do, I find it's best to use a cigarette lighter to melt the ends a little bit to seal it. It keeps the ribbon from fraying while you're pulling it through the eye loops. Just string it on like a shoelace. And come to think of it, you could use any kind of string you find at the store. Even shoelaces would look cool if you got the printed kind with checkers or stars etc on them. Just make sure it's long enough! I actually skipped every other eye all the way down my corset, because I was in a rush and cut the ribbon too short and didn't feel like wasting it and cutting another one.

Tada! You're done and you've made a lovely new casual dress that everyone will envy you for. Now take pictures and email them to me to show me how you changed my pattern.
No comments:
Post a Comment