
I skipped class today to go downtown with my awesome little bro, Kevin, and do some fabric shopping. I really wanted to make a new dress for the family Christmas dinner, and I got a lovely $2 "Inspired by Project Runway" pattern for a babydoll dress with variations on sleeves, pockets, and trims. I can never quite stop myself from picking up $1 and $2 patterns, because they make wonderful base pieces. I have lots of different hood, sleeve, and bodice pattern pieces I take from envelope patterns that I can then add to and change to make something else.
I love love love King Textiles in downtown Toronto. King and Spadina, okay? =P It's this lovely fabrics store that has absolutely EVERYTHING, and I mean everything. I got all the fabric I needed for a new dress (satin for the skirt, some awesome scale print for the bodice, and grey satin lining) for less than $40! Plus, Kev and I passed a guy on the corner at Queen St handing out student discount cards. So I got an additional 20% off everything. Kev got himself 2 bolts of leather for $6 a piece. Seriously, try to beat that. If I went to Zara or something and bought a dress made from the fabrics I bought today, they'd be charging upwards of $115.
The only part I'm not entirely happy with is that 2 yards of black trim from Sussman's cost my $9. That's a bit pricey imo for trim. But I got a bunch of foil beads from Arton's for $9 to make a bib necklace design on my dress. Woohoo! Time to get started.
Tuesday, December 1, 2009
Monday, November 16, 2009
006. Organization in the sewing/craft room
First off, I've been ridiculously busy with schoolwork and haven't been able to sew or even post for the past week or so. I feel terrible, and just felt the need to explain myself. Now, on to the topic for today!
I've recently been butting heads with my parents about my "sewing room" in the basement. I actually have a ton of space, and should be very thankful. However, I suck at organization and space utility. I'm also a procrastinator, hence why I'm writing a blog post instead of actually doing any cleaning. (Hey, I started!) I've come up with a bit of a problem that's going to need some crafty ingenuity, I guess.
I have a shitload, and I mean shitload, of storage drawers. I have this constant need to buy more storage drawers, but I don't seem to be making enough use of them. I have a bunch of different sizes, and they're mainly filled with junk, to be honest. I love Rubbermaid plastic drawers, the kind that come in towers of various sized drawers. The problem is that I'm not sure how I should organize everything.
I have some nice wide, but shallow, drawers that I meant to use for fabric storage. But then I had to ask myself, how to divvy up the fabric and somehow categorize them so I know where everything is?
Then I have a tower of 4 drawers, 2 shallow ones and 2 deeper ones, which fits very nicely under my cutting table. It's filled with old school stuff I need to clear out and get rid of, but then what do I do with it? I've got the top 2 drawers cleared, and I put my scissors in the top drawer. But what else? And how do I keep it from being a hazard to fingertips? hm.
I think I possibly want to use the second drawer to store thread, but how can I keep it from getting all tangled? I need some kind of rack. So here's my plan. Measure the bottom of the drawer, and get my sister (who's very handy with power tools and owns a table saw) to cut me a piece of scrap wood to fit in there. Then get some dowels and glue them or nail them to the board. Then I think I can put my threads on the dowels inside the drawer. I've seen other people hang thread racks on the wall, but I don't think I want to bother looking for studs behind the drywall. It's a nightmare in this basement.
I also need to figure out some ergonomic way to position all the drawers. Labels will be good.
I know I have a small set of 3 drawers that can sit on top of the filing cabinet where I can put smaller notions, like buttons, zippers, etc. Then there's the question of desktop items, like seam rippers, bobbins, pincushions, and replacement machine needles, and how I'm going to keep those. I have boxes on the table, but I don't like them.
I'll post pictures when I'm done! This is going to be more than a one day project, I'm assuming. Back to work for me.
Saturday, November 7, 2009
005. Inspiration
Today's post is just a short one about where I draw inspiration from. There are a lot of places to look to get inspired. I find the best ones are communities and forums with other DIY enthusiasts.
These are my top 3 favorites (annotated links).
www.ohmystars.net
A small website of tutorials, tips, and crafts. The content is mainly t-shirt surgery and knitting. It's a great place to start for beginners.
http://t_shirt_surgery.livejournal.com
Probably my favorite place on the net. It's a journal community for people who like to cut up and sew t-shirts to make them into all sorts of different things. There are various tutorials, lots of pictures, and some very creative girls. My favorite DIY wardrobe activity is t-shirt surgery. It's just so simple, and the things you can make are so diverse.
www.threadbanger.com
A vlog about DIY alternative fashion. They're all about the environment, creativity, and promoting green ideals. I love their Friday projects, and their home decor tips.
Wednesday, November 4, 2009
004. Sewing/Craft Rooms
Another thing you have to think about when you start getting into sewing your own clothes, is how much space it's going to take up in your house, and how much space you can afford. I started out just hand sewing things in my bedroom, but when I moved to university, I got a little spoiled in our house, where we had a largely unused living room where my housemate and I set up a sewing area, and the couch got covered in projects, and there was fabric all over the floor. I had stacks of cardboard boxes vomiting fabric all over the place, and no one really complained. When we moved to another townhouse, we were lucky enough to have a spare bedroom even with 4 people in the house, and it was used as a guest-room-slash-sewing-room, where once again, there were boxes vomiting fabric all over the place, and projects were stored in plastic shopping bags. I also got a dressform, which is one of those adjustable foam covered mannequins you use to make clothes from scratch.
You have to think hard about organization. I'm not the most organized person in the world, so my mother hates venturing anywhere near my sewing room, but I call it an organized mess. I know where everything is, even if I have to dig into old suitcases for it. I've seen people stack clear plastic rubbermaid bins to the ceiling! And have things pinned all over the walls. The only thing I'm marginally organized with, is my patterns. I have a U-desk with a filing drawer, so I bought a pack of hanging folders, and the drawer is bursting with patterns. The best thing, though, is that I don't have to really bother with fitting the fiddly folded patterns back into the tiny envelopes they come in. I just fold them as far as I can, and stick them in a file folder.
I don't go to the fabric store as often anymore, unless I have a very specific project in mind. Most of the time, I can now go into my fabric storage room, and dig around in there. I have a habit of buying fabric I don't particularly need, just because I like the pattern or it was on sale. I once bought about 5 meters of stretchy lycra fabric with cherries on it, just because I liked the cherries. I had no idea what the hell I'd do with lycra. It wasn't until about 5 years later that I actually did something with it. And I love going to the fabric store down the street from my house every month, and checking out what fabrics they have on sale for $2-$4/m. I have stacks of 2-3 meter bolts of patterned fabric that I haven't found a use for yet. Like the Tom and Jerry print upholstery fabric...I'll find a use for it someday! Even though it may feel like a waste of money, I like this strategy. That fabric isn't going to expire. (Just don't lose it!) And you'll find a use for it someday. Sewing and crafting is somewhat of a lifelong hobby, in my opinion. Once you start, you can't bring yourself to stop.
My desk also doubles as a computer desk and sewing desk. The computer sits on one part of the U, and my sewing machine is on the next bend. So all I do is swivel my chair. I find it works out really well to have my computer and my sewing in the same room, that way I can look up tutorials and patterns while I'm sitting at my sewing machine, and I can play music while I work. I also keep a garment rack in the room, for finished and unfinished projects, and random other clothes that I take to photoshoots. I have a lot of costume pieces, and things I used to wear to class but don't wear anymore.
I have also recently added a cutting table to my sewing room. I had to plug in 2 more lamps to get proper lighting, but I now have a nice table to cut fabric on, after years of straining my neck and back to cut on the floor. Light is another important thing to think about. I had to set up 4 lamps around the room to add to the ceiling light. However, my room is in a basement, with a very tiny window up high on the wall. If you have a room with a big enough window for natural light, you probably won't have the same problem as me.
PS. Sorry no post yesterday! I was at an Atreyu concert. It was wicked.
Monday, November 2, 2009
003. The sewing kit (tools for becoming a DIY seamstress)

I went to a crafts store, and just got a big plastic box with sections. Bead boxes work really well. Or, for better durability, you could go to a hardware store and get a fishing tackle box. They come in lots of different sizes, some have adjustable compartments, and they're really sturdy. Decorate it if you want. Fishing tackle boxes aren't very pretty. =P
Things to put in a sewing kit:
Needles - DO NOT get the cheap dollar store needles that come out of a round plastic package. The needles in those kits are dull, and could rip your fabric, not to mention dull needles are harder to push through fabric than good sharp ones. The price difference is nothing. A dollar store sewing kit costs $1.50, and everything is garbage quality. A pack of good needles at a sewing store is $1.50-$2 and you'll get 100 in different sizes. And if you have a machine, make sure you stock a couple packs of replacement needles, and even specialty kinds like double needles, denim, etc.Pins (and a pincushion) - a box of straight, open end pins are about $1.15 at my sewing store. Once again, don't bother with dollar store pins. They're too short, dull, and the sometimes I find the plastic heads pull off.
Thread - build up a good selection of coloured threads as you go. And always get the biggest spool of black and white that you can afford, cause you'll use lots of it.
Stitch ripper - looks like this. It's used to cut and pick out thread if you make a mistake, or if you need to open hems or seams on a piece of clothing. The space between the two points has a small blade that can cut the thread if you run it along a seam. Alternatively, you could also get a seam ripper, and/or buttonhole cutter. They look the same, but are bigger, and usually have a sharper blade.
Fabric scissors - Large, and usually kind of flat along the outside of one blade, so you can rest it against a table when cutting fabric. And never, ever use your fabric scissors to cut anything else. Using them as household scissors will dull the blade and make it difficult to cut fabric. You can find a variety of sizes, but I use an all-purpose mid-sized pair. I also have more than one pair of scissors, so I don't have to move them from one station in my sewing room, to another. So, I leave a pair on my cutting table, and have a small pair on my machine table for cutting threads and clipping seams etc, and another pair on my ironing board.
Bobbins (if you have a sewing machine) - empty ones, and all the coloured ones! Keep a space for them.
Tissue paper - I get the gift wrapping kind from the dollar store. This is for drawing and cutting out patterns.
Scotch tape - for taping squares of tissue paper together when tracing large pattern pieces.
Measuring tape (self explanatory)
Chalk - tailor's chalk comes in a few colours, and it's either rectangular or triangular. You can also get plastic holders for it. This is for marking out seams on your fabric, or outlining pattern pieces. You usually get 2 or 3 colours in a package, a white for dark fabrics, and some other colour (I have pink and blue) for lights and whites. Tailor's chalk will draw thinner, darker lines on the fabric. However, I survived for a long time on dollar store chalkboard chalk. You just get chalky fingers after a while.
Safety pins - there's no specific use for them, but they are useful. Just don't use them in lieu of straight pins when doing actual sewing, because safety pins slide and catch. I always keep a stash of them in my sewing box just as an all-purpose tool. One of my main uses is when making elastic waist skirts, I use a safety pin to push the elastic through the waistband.
And that's it for a basic sewing kit! As you continue sewing, you'll collect a lot of notions (buttons, zippers, ribbons, lace, etc) that you should organize in sections in your box. I also use a large 3-ring binder with plastic paper covers as pockets for lace, string, etc. My sewing box sits on a corner of my sewing/computer desk so that it's within reach all the time.
Sunday, November 1, 2009
002. Happy Halloween!
I love Halloween. Ever since I was a kid, I love this occasion to dress up, go nuts, and nobody will judge you. I love playing dress up!
Here's my last minute Halloween costume, and a pretty simple how-to for turning an oversized tshirt into a dress. I wish I had thought to do a photo tutorial, but alas. Next time.
I'm always last minute when it comes to costumes, and amazed I pull it off sometimes. My mom asked why I always do that, but I just can't help it. I've been busy going to school this month, so I didn't set a lot of time aside to decide what to wear to my friend's Halloween party, and I got a little lazy. I wasn't going to dress up in costume at all. But I just can't pass up an opportunity to get dressed up for any event!

Difficulty: Mild
It's really just a dress, not necessarily Halloween-y, and I put on some zombie makeup. This dress could be worn anytime in my opinion.
Materials:
1 t-shirt that's too big on you. In this case, I think mine was a men's large
2-3 meters of fabric for the skirt. I used 2 different colors of tulle to make a tutu, but you could use anything. I've cut up thrift store clothes, or picked up $2 fabric in the clearance section at FabricLand
1 meter of hook & eye tape, but just the eye part. You can usually find it separate on spools at fabric stores
1 skein of ribbon in a co-ordinating colour
Fabric scissors. Never cut paper with them as it dulls the blade
sewing machine or a needle and thread and some patience
chalk (from a dollar store works fine)
Step One:
Cut the sleeves off the shirt without cutting any seams, and put it on inside out. Mark with a piece of chalk where you want the armhole to close under your arm. If the shirt is too big, chances are the arm holes are way too big, too, so you'll need to alter it.
Step Two:
Sew up the area under the arm holes. It doesn't have to be perfect, since the corset ribbon will pull the back and hide any mistakes. And since it's tshirt material, I don't usually bother with hemming the arm holes or anything, just tug on it a little and it rolls. Tshirts don't normally fray. (If you need to make sleeves, check out this simple tutorial)
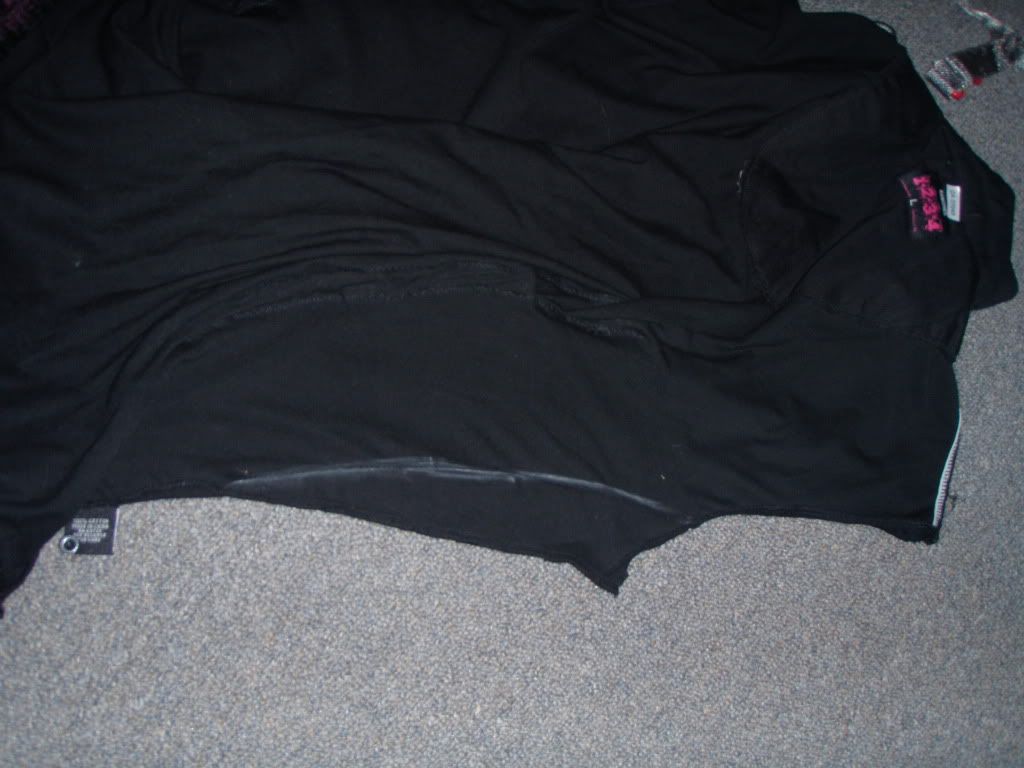
Step Three:
Turn the shirt right side out again, and put it on to see how it hangs. Get a buddy to help you make 2 marks straight across the back of the shirt - one goes along the bottom of your shoulder blades, and the other should be somewhere around your hip.

Step Four:
Lay the eye tape down in 2 strips with the eye loops facing each other, and pin it to the shirt. Arrange it however you like a corset to look. Get creative! Another suggestion is to mark and place the corsets along your sides instead of the back. I love the corset look because it's not just useful for making anything fit, but looks good too, and adds some texture. Now, sew the eye tape to the shirt.
Step Five:
Get your frill fabric ready. Put the shirt (now it's almost a dress) on, and measure how long you want the skirt to go. You can keep it short like I did, or choose to make it longer. You could even go full length if you prefer that look. Most fabrics will come in 40 or 60 inches, and you get it folded in half. My tulle came in 40", and I'm lazy, so I simply folded it a couple times without cutting at all. It takes time to pin it, but tulle is finicky and much easier to cut afterward, plus I wanted the poofy layers. If you're using cotton or any other fabric, then measure it out for whatever length you want, and add about 1.5"-2" for seam allowance and hem.
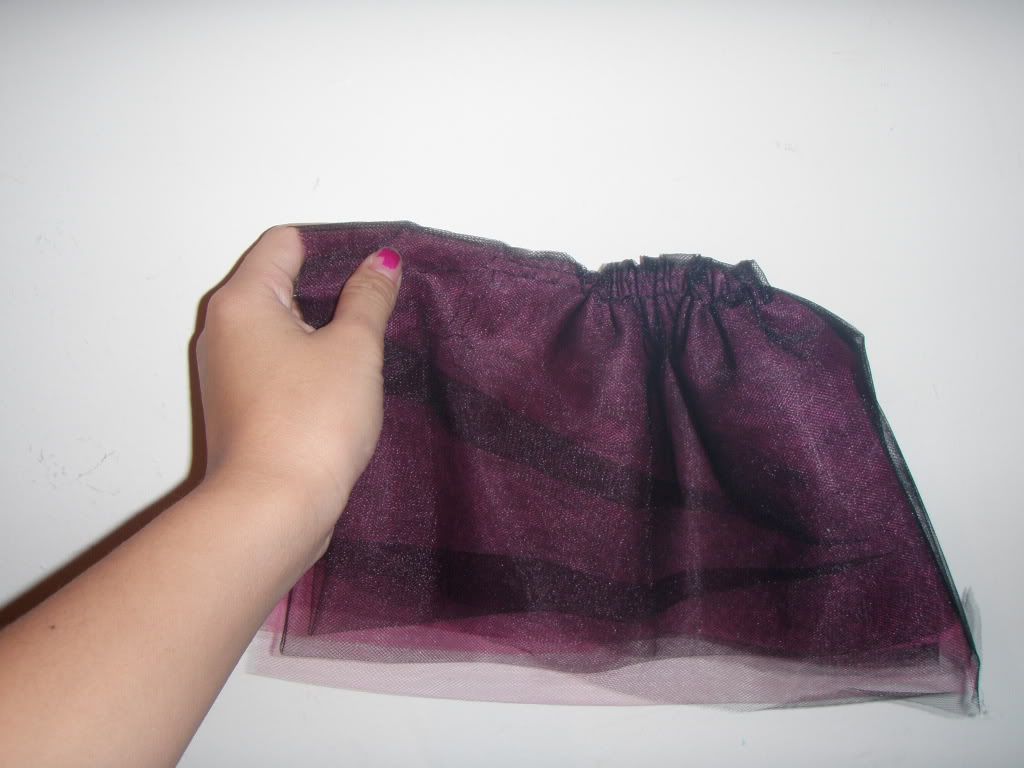
Step Six:
Now we're going to ruffle the skirt. If you have a sewing machine, use a straight stitch and set your stitch length/width/tension as loose as it will go. If you're sewing by hand, use fairly long, loose stitches for this. If you use a machine, do not knot or finish the ends, you must leave long threads from both bobbin and spool on either ends of the fabric. Now, sew along the long edge of your fabric. Then, pull the threads to gather the fabric into a ruffle. Depending on your skirt preference, and your level of skill with sewing, you can pleat, make a circle skirt, make an A-line skirt, whatever you please! The amount of fabric you use affects how poofy the skirt will be. So if you don't want it to be too cupcake-like, use less fabric and you'll have to adjust and gather loosely. 2.5-3 meters is what I normally use. Generally, the ratio of measurement for a skirt is the hem should be at least twice around your waist. (Use this tutorial if you need more photos on how to ruffle).
Step Seven:
Hem your skirt if you need to. I didn't, because I used tulle and the idea was for it to be uneven raw edges. To hem, you'll need to iron the un-ruffled raw edge of the fabric. Just fold it about .5" (or about 1.5cm) underneath, and press it with an iron. Then, sew it down with a machine, or if you're doing it by hand, use a backstitch or hem stitch, depending on your level of skill.
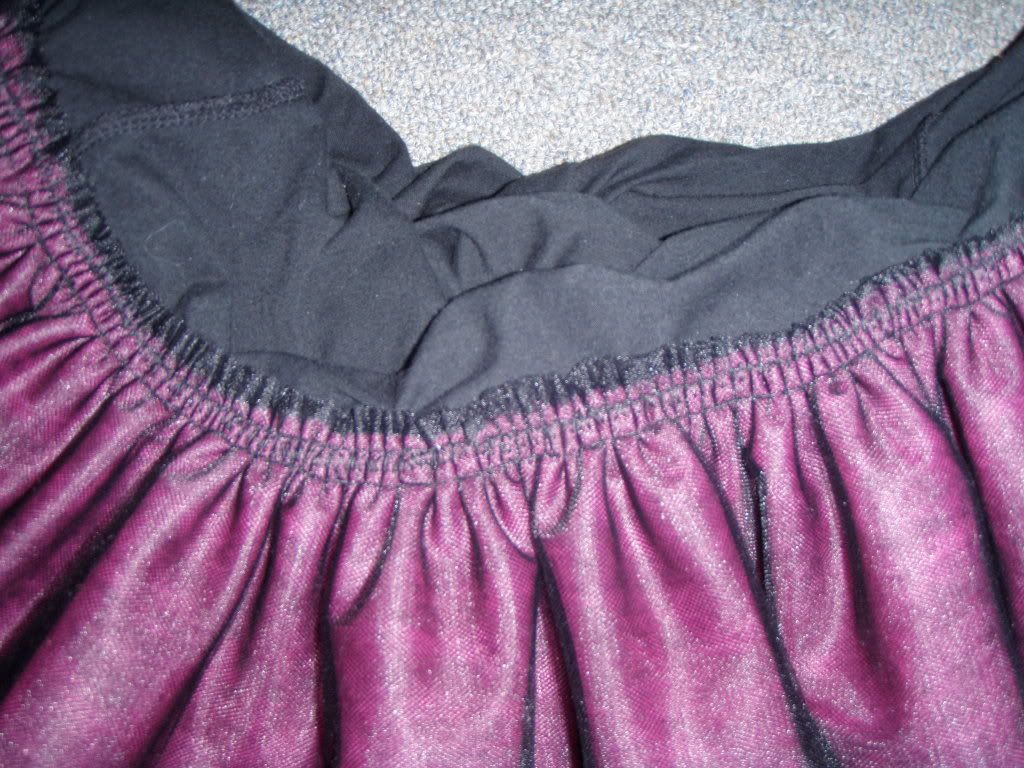
Step Eight:
Now you're going to pin the ruffled skirt to your tshirt RIGHT SIDES TOGETHER. I can't stress that enough if you have patterned fabric for the skirt. Match up the bottom of the tshirt hem to the gathered edge of the skirt. You could rip the stitches on the shirt hem, or I usually just pin and sew directly over the existing threads on the bottom of the shirt. This is because tshirts are sewn with a serger, which has 4-8 threads on it, instead of a standard 2 thread machine. That makes it really fiddly and difficult to pull all of it out, so I just don't bother. :) Now sew the skirt onto the tshirt.
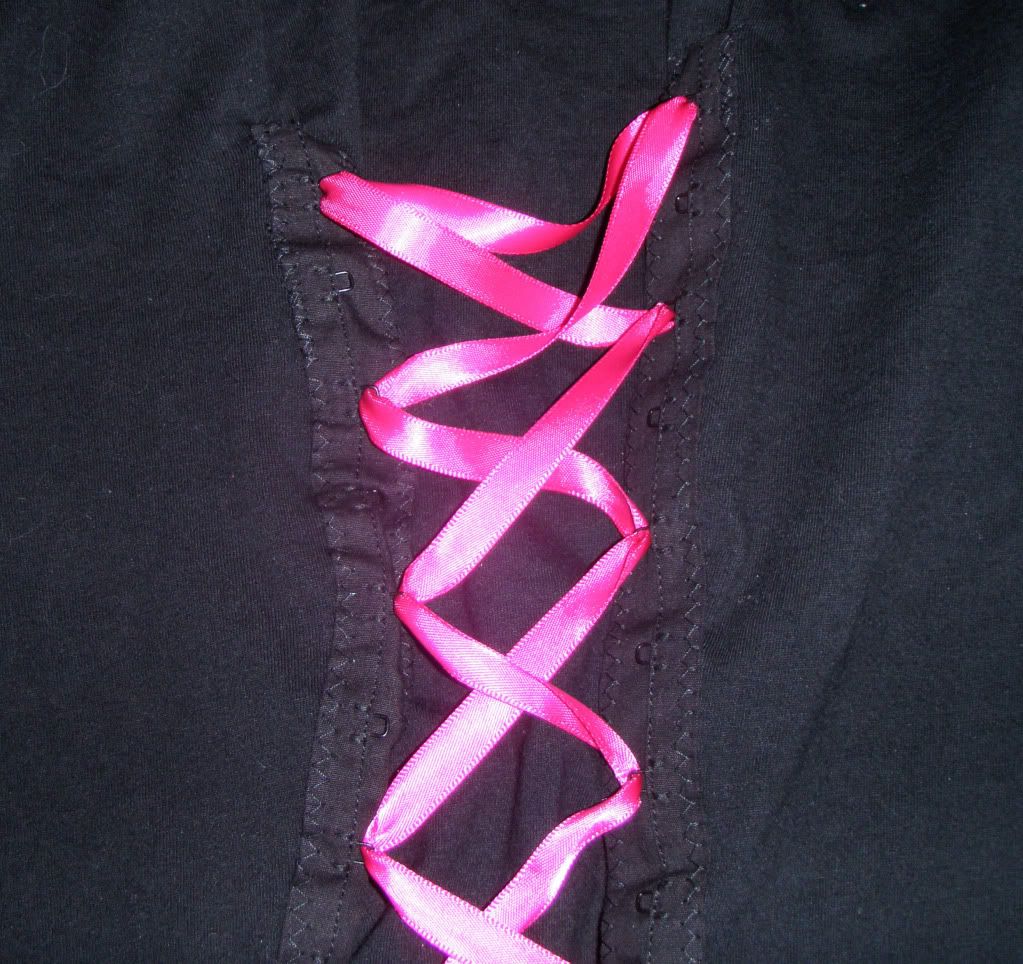
Step Nine:
Thread the ribbon through the eyes on the eye tape. (Easiest to do this last so that you don't have ribbon hanging in the way while trying to sew the skirt on). If you get the regular $1 synthetic satin ribbon like I do, I find it's best to use a cigarette lighter to melt the ends a little bit to seal it. It keeps the ribbon from fraying while you're pulling it through the eye loops. Just string it on like a shoelace. And come to think of it, you could use any kind of string you find at the store. Even shoelaces would look cool if you got the printed kind with checkers or stars etc on them. Just make sure it's long enough! I actually skipped every other eye all the way down my corset, because I was in a rush and cut the ribbon too short and didn't feel like wasting it and cutting another one.

Tada! You're done and you've made a lovely new casual dress that everyone will envy you for. Now take pictures and email them to me to show me how you changed my pattern.
Here's my last minute Halloween costume, and a pretty simple how-to for turning an oversized tshirt into a dress. I wish I had thought to do a photo tutorial, but alas. Next time.
I'm always last minute when it comes to costumes, and amazed I pull it off sometimes. My mom asked why I always do that, but I just can't help it. I've been busy going to school this month, so I didn't set a lot of time aside to decide what to wear to my friend's Halloween party, and I got a little lazy. I wasn't going to dress up in costume at all. But I just can't pass up an opportunity to get dressed up for any event!
Difficulty: Mild
It's really just a dress, not necessarily Halloween-y, and I put on some zombie makeup. This dress could be worn anytime in my opinion.
Materials:
1 t-shirt that's too big on you. In this case, I think mine was a men's large
2-3 meters of fabric for the skirt. I used 2 different colors of tulle to make a tutu, but you could use anything. I've cut up thrift store clothes, or picked up $2 fabric in the clearance section at FabricLand
1 meter of hook & eye tape, but just the eye part. You can usually find it separate on spools at fabric stores
1 skein of ribbon in a co-ordinating colour
Fabric scissors. Never cut paper with them as it dulls the blade
sewing machine or a needle and thread and some patience
chalk (from a dollar store works fine)
Step One:
Cut the sleeves off the shirt without cutting any seams, and put it on inside out. Mark with a piece of chalk where you want the armhole to close under your arm. If the shirt is too big, chances are the arm holes are way too big, too, so you'll need to alter it.
Step Two:
Sew up the area under the arm holes. It doesn't have to be perfect, since the corset ribbon will pull the back and hide any mistakes. And since it's tshirt material, I don't usually bother with hemming the arm holes or anything, just tug on it a little and it rolls. Tshirts don't normally fray. (If you need to make sleeves, check out this simple tutorial)
Step Three:
Turn the shirt right side out again, and put it on to see how it hangs. Get a buddy to help you make 2 marks straight across the back of the shirt - one goes along the bottom of your shoulder blades, and the other should be somewhere around your hip.
Step Four:
Lay the eye tape down in 2 strips with the eye loops facing each other, and pin it to the shirt. Arrange it however you like a corset to look. Get creative! Another suggestion is to mark and place the corsets along your sides instead of the back. I love the corset look because it's not just useful for making anything fit, but looks good too, and adds some texture. Now, sew the eye tape to the shirt.
Step Five:
Get your frill fabric ready. Put the shirt (now it's almost a dress) on, and measure how long you want the skirt to go. You can keep it short like I did, or choose to make it longer. You could even go full length if you prefer that look. Most fabrics will come in 40 or 60 inches, and you get it folded in half. My tulle came in 40", and I'm lazy, so I simply folded it a couple times without cutting at all. It takes time to pin it, but tulle is finicky and much easier to cut afterward, plus I wanted the poofy layers. If you're using cotton or any other fabric, then measure it out for whatever length you want, and add about 1.5"-2" for seam allowance and hem.
Step Six:
Now we're going to ruffle the skirt. If you have a sewing machine, use a straight stitch and set your stitch length/width/tension as loose as it will go. If you're sewing by hand, use fairly long, loose stitches for this. If you use a machine, do not knot or finish the ends, you must leave long threads from both bobbin and spool on either ends of the fabric. Now, sew along the long edge of your fabric. Then, pull the threads to gather the fabric into a ruffle. Depending on your skirt preference, and your level of skill with sewing, you can pleat, make a circle skirt, make an A-line skirt, whatever you please! The amount of fabric you use affects how poofy the skirt will be. So if you don't want it to be too cupcake-like, use less fabric and you'll have to adjust and gather loosely. 2.5-3 meters is what I normally use. Generally, the ratio of measurement for a skirt is the hem should be at least twice around your waist. (Use this tutorial if you need more photos on how to ruffle).
Step Seven:
Hem your skirt if you need to. I didn't, because I used tulle and the idea was for it to be uneven raw edges. To hem, you'll need to iron the un-ruffled raw edge of the fabric. Just fold it about .5" (or about 1.5cm) underneath, and press it with an iron. Then, sew it down with a machine, or if you're doing it by hand, use a backstitch or hem stitch, depending on your level of skill.
Step Eight:
Now you're going to pin the ruffled skirt to your tshirt RIGHT SIDES TOGETHER. I can't stress that enough if you have patterned fabric for the skirt. Match up the bottom of the tshirt hem to the gathered edge of the skirt. You could rip the stitches on the shirt hem, or I usually just pin and sew directly over the existing threads on the bottom of the shirt. This is because tshirts are sewn with a serger, which has 4-8 threads on it, instead of a standard 2 thread machine. That makes it really fiddly and difficult to pull all of it out, so I just don't bother. :) Now sew the skirt onto the tshirt.
Step Nine:
Thread the ribbon through the eyes on the eye tape. (Easiest to do this last so that you don't have ribbon hanging in the way while trying to sew the skirt on). If you get the regular $1 synthetic satin ribbon like I do, I find it's best to use a cigarette lighter to melt the ends a little bit to seal it. It keeps the ribbon from fraying while you're pulling it through the eye loops. Just string it on like a shoelace. And come to think of it, you could use any kind of string you find at the store. Even shoelaces would look cool if you got the printed kind with checkers or stars etc on them. Just make sure it's long enough! I actually skipped every other eye all the way down my corset, because I was in a rush and cut the ribbon too short and didn't feel like wasting it and cutting another one.
Tada! You're done and you've made a lovely new casual dress that everyone will envy you for. Now take pictures and email them to me to show me how you changed my pattern.
Saturday, October 31, 2009
001. How to sew your own wardrobe
I wanted to write a first post about why I'm writing this blog. Maybe it'll be better served in the profile at a later date, but for now, that's what I want to talk about. I just want to get it down in writing what I want to do with this blog, and where I want it to go, so that I can come back to this post if I ever get off track.
Ever since I was in high school, I found that I wasn't satisfied with the clothes I bought at the mall. It wasn't enough to really show my uniqueness or creativity, in a time when I think all kids should (are?) discovering themselves and their individuality. Can't say I didn't buy into certain trends, but I think that's what fashion is about.
I liked alternative styles; I'm not ashamed to say I was a Hot Topic fanatic at 14. Hey, we're all a little stupid at 14. But I also wasn't impressed by the quality of clothing and accessories sold at Hot Topic, and I thought "Hey! I can do this with a little practice. I know I want a dress that looks like this, but I don't have the funds for all this overpriced crap that's not worth the money anyway, and I can figure it out."
So I started checking things out on the internet. What did we use back then? Yahoo search? AskJeeves? Whatever. I then discovered things like DIY sites, and the relation of DIY to punk culture, and the snowball kept rolling.
From weekly trips to the thrift store, I managed to cobble together several shirts, skirts, and dresses by hand-sewing, non-sewing, safety pinning, and gluing. (Yes, gluing. I didn't get a sewing machine of my own until I was 20). People at school began to notice my clothes. And when my grandma noticed, she started teaching me how to knit and sew with her machine.
Over time, my style choices changed, my skills improved, and I continued joining forums and online communities for crafty people like myself. I'm a huge fan of customization. I love going to any store, and buying a piece of clothing, then going home and cutting it up, adding things to it, and making it my own thing. I like standing out in a crowd by dressing a little differently (although I've toned it down a hell of a lot since high school!), and just having a bit more sparkle than the person who stands next to you crossing the street. It feels good.
In this blog, I'd like to talk about building your own customized wardrobe. None of that magazine fashion nonsense. Current trends are all good and well, but there's something to be said about being able to make it your own with your own hands. I'm not going to tell you what to wear, or how to wear it, but I will post tutorials for things I've made, and hopefully be able to sell a few interesting garments to other people who appreciate the same fashion sense as myself.
This is not about me dictating, or even advising you on fashion. I want to try to keep it open, while adding my opinion. I want the reader to make his/her own decisions and opinions based on personal preference, because style is all about personality. Fashion is beautiful, and always changing, but incredibly difficult to obtain. Style is all about being yourself, and showing people what kind of person you are by the way you can express yourself through your clothing.
Sew a Wardrobe is about learning some DIY tricks and, literally, sewing a wardrobe. Finding any manner of things to get creative with, and recycling things you already own so that you use every piece in your wardrobe. It's not just cool, it's economical. :) I'm going to try to post as many varied topics as I can, for clothes you can wear to school, to work, to the mall, or for lunch with a friend, to concerts, clubs, costume parties, and whatever else I can think of. And I hope that with this blog, I can inspire people to be more creative and expressive with their everyday look.
Subscribe to:
Posts (Atom)